🚫 AdBlock Detected
Please disable your AdBlocker, it helps keep Avian Directory free for all bird lovers to use.
Register an account or Log in. Logged in members do not see adverts!
Thank You
Please disable your AdBlocker, it helps keep Avian Directory free for all bird lovers to use.
Register an account or Log in. Logged in members do not see adverts!
Thank You
Hand rearing is can be a great experience for a bird keeper, but it can also be challenging for others, so this page will outline how to do it.
I have been involved in countless conversations about hand rearing, and it is always an interesting and often misunderstood topic. One of the first questions that arises when discussing hand rearing is why it is being considered in the first place.
There are many reasons a bird may need to be hand reared. Eggs or chicks may be abandoned by the parents, a sick or weak bird may require assisted feeding, or someone may wish to raise a chick as a tame companion that readily interacts with humans. Most often, it is newcomers to bird keeping who are drawn to hand rearing with the aim of producing a friendly pet.
While the desire is understandable, there is a great deal to learn before attempting to hand rear any bird. Hand rearing is a valuable skill, not only for young chicks but also for birds of any age that may require assisted feeding due to illness or injury. In cases involving sick birds, additional knowledge and experience are often essential to avoid causing harm.
The feeding process alone can be challenging, even for those with years of experience. Incubation presents its own difficulties, depending on the equipment used and the keeper’s understanding of temperature, humidity, and timing. Having the correct tools and preparation in place before starting is vital.
The reasons for incubating eggs or hand rearing chicks can be simple or highly complex. This section aims to cover all of these aspects to make the process clearer and less overwhelming. When I first began hand rearing as a novice, the experience was extremely difficult and, at times, disheartening.
Early on, you may experience failed hatches, chick losses, or eggs that never develop at all. Feelings of disappointment and failure are common, but they are part of the learning process. Over time, patience and timing reveal themselves as two of the most important factors in successful incubation and hand rearing.
I vividly remember waiting for an incubation period to end, watching chicks hatch, and then losing them one by one the following day. It was heartbreaking. This guide will offer practical advice to help reduce the chances of such losses and improve the survival of your hatchlings.
Not everyone owns an incubator, and many people are unsure how to build one that is reliable enough for the task. For this reason, I will explain how to construct a simple and affordable incubator that should perform adequately.
If you do not intend to incubate eggs and only wish to focus on hand rearing chicks that have already hatched, you may skip the incubation section and proceed directly to the hand rearing chicks section below.
Never remove eggs or chicks from a nest that is doing well unless there is a good reason to do so. Sometimes eggs are laid on the floor or dropped from a nest, and these eggs are the best candidates for incubation if they are fertile.
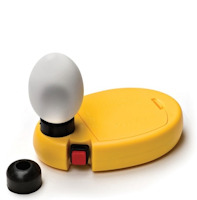
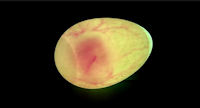
Keeping track of embryo development can be achieved by candling using an egg candler (Figure 3) or by shining a light through the egg. You may find a nest that has been abandoned and contains eggs. These are also perfect candidates for your incubator. However, as with any egg, there is always the possibility that an egg may be infertile, or may have been partly incubated and the chick died in the shell. Therefore, each egg will need to be candled.
Any eggs that appear damaged should be discarded unless they contain a live hatching chick. Damaged eggs, or those which are leaking, can quickly contaminate other nearby eggs. Fertile eggs that have been tossed or dropped on the floor can either be placed back into the nest or placed in your incubator.
Always wash your hands before handling any eggs to avoid transferring any microorganisms, which may later harm developing embryos. Additionally, make sure your incubator is cleaned and sterilized properly before placing any eggs into it.
If you are using a proper incubator (Figure 10), make sure to check that everything is working first. Inspect power leads, check the settings, and test the temperature, humidity, and egg-turning mechanism (if automatic).
If you do not have an incubator, you have the option to either buy one or build one yourself. I have been asked countless times which incubator I use. I use a Brinsea Mini Advanced Incubator placed on a rubber mat to isolate any vibration from the machine.
This incubator does exactly what I need: it maintains a constant temperature for the eggs, turns them periodically, keeps the humidity correct, and stops automatically when the eggs are due to hatch. It is fully programmable and requires little or no prior knowledge to use.
The brand you choose to buy is up to you. However, if you plan to build your own incubator, manual egg turning will be required approximately every 3 hours.
This homemade incubator is the simplest of all incubators and requires only a few items. Below is the list of items needed to build it:
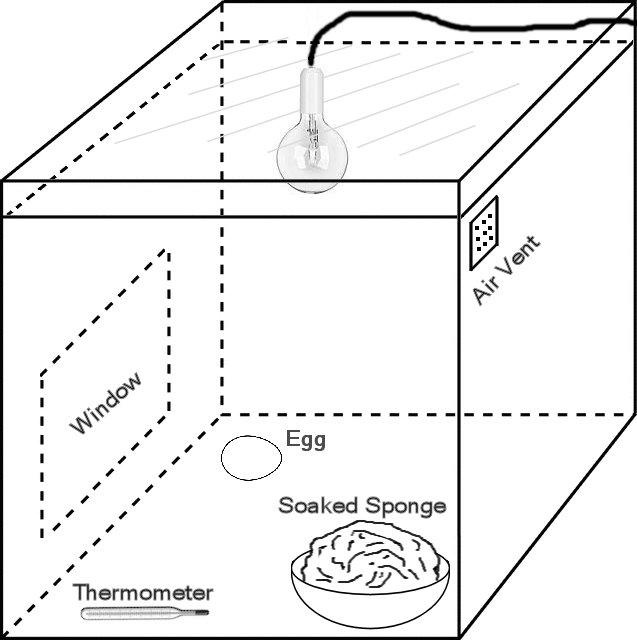
The construction is very simple and should take around 15 minutes once the main box is ready. It is important to fix the light as high as possible, keeping the bulb at least 4 cm away from the sides and top to avoid burning the box. The thermometer should be placed at the same level as the eggs to accurately measure the temperature around them.
The dish should be placed at the opposite end of the box from the light and eggs, and the sponge, soaked in water, placed in the dish or cup to maintain humidity. The light dimmer switch controls the amount of heat the bulb produces, while the thermometer monitors the actual temperature at egg level. The sponge ensures the eggs do not dry out, so it must be kept soaked at all times.
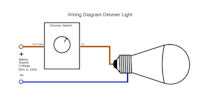
The box should have a small window so you can check the thermometer without opening the box, ensuring a true temperature reading. Figure 2 shows how the incubator should look when built, and Figure 1 shows the wiring schematics.

The circuit (Figure 1) is very simple. When opening the back of the single dimmer switch, you should find connectors marked L1 and L or Com. Sometimes L is used instead of Com, or vice versa, but they essentially mean the same thing: this is where the live wire is connected. Depending on your country, the colours of the mains wires may differ from those shown in Figure 1, and the voltage may also vary. As long as you connect the mains live wire to L or Com and the mains negative wire to L1, the wiring is correct.
How it works: The voltage is fed from the mains live wire to the L or Com connector of the dimmer switch. The voltage then comes out of L2 of the dimmer to the positive connection of the light bulb. The negative side of the light bulb returns voltage back to the mains negative wire.
When the dimmer switch is turned on, you can use the dial to increase or decrease the wattage supplied to the light bulb, making it brighter or dimmer. The brighter the bulb glows, the more wattage it uses, producing more heat. Conversely, dimming the light reduces wattage and heat. Of course, you will need to add a wall plug to operate the circuit, but it is assumed you already know how to wire a simple wall plug.
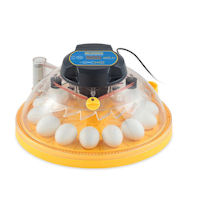
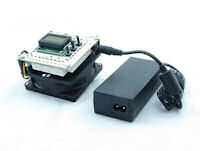
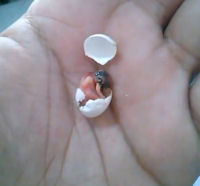
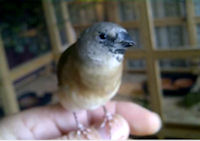
Figure 2 shows the final setup of the incubator. All components are positioned for safety and to ensure the incubator runs as efficiently as possible.
Before placing any eggs inside, make sure the red light bulb is working and the dimmer is functioning correctly. Keep the sponge soaked at all times to maintain humidity, but do not place it directly under the light bulb. Ensure your thermometer is accurate and properly positioned. The air vent can be a few small holes drilled near the top of the box to allow fresh air and moisture to escape. The window can be made of perspex, glass, or any transparent material of your choice.
The light should be securely fitted within the lid by drilling a hole, attaching it, and securing it with the provided washer to keep wiring away from water vapor. Place the egg or eggs in the corner opposite the bowl with the soaked sponge. The thermometer (Figure 9) should be at the same level as the eggs to provide a true temperature reading. Long, thin glass thermometers (Figure 17) can also be used to save space.
This incubator is a still-air incubator, meaning there is no forced air movement, only heat-driven circulation. Once set up, you will need to test the incubator several times. Each test should last around 2 hours to obtain an accurate temperature reading.
During testing, remember to soak the sponge, place the thermometer at egg level, close the box, open the air vent, and then turn on the incubator. The ideal temperature for incubating finch eggs is 99.6 °F (37.6 °C), which should remain stable throughout the incubation period.
Birds may occasionally leave the nest, allowing the eggs to cool briefly—usually for no longer than 15 minutes. Opening the box periodically can help mimic this natural cooling. Always wash your hands before handling eggs, and ensure the inside of the incubator remains germ-free.
Once you find the correct dimmer setting, mark it for future reference. Keep in mind that external temperature affects the incubator’s internal temperature. During a heatwave, the incubator may become hotter than expected, requiring you to reduce the dimmer setting. Conversely, if the incubator is too cool, increase the dimmer setting. Check the temperature daily or several times a day.
Turn the eggs approximately every 3 hours by rotating them 90° one way, then 90° back 3 hours later. You can mark the eggs with a magic marker to track rotation. Check embryo development by candling the eggs with a strong LED pen light or egg candler, taking care not to damage the eggs.
Most finch eggs take about 13–15 days to incubate, counting the day after incubation begins as day one. If all steps are followed correctly, you can expect the eggs to hatch on the 13th–15th day. Once the chicks hatch, the real work begins.

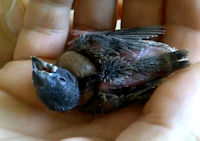
It is always exciting when the eggs begin to hatch; this marks the beginning of their real lives. It is important not to feed the newly hatched chicks until the following morning. On the day they hatch, they rely entirely on the nutrition from the yolk sac.
While you may be tempted to pick them up, poke at them, or show them to others, this should be avoided to ensure their survival. The first day is generally calm because little or no work is required. Once all chicks have hatched, reduce the incubator temperature to about 85 °F and maintain humidity by keeping the sponge soaked at all times. Chicks should never dry out due to low humidity.
Food preparation should be done carefully, paying attention to mixture consistency, temperature, and feeding amounts. Most chicks do not require feeding on day one, but some species may need it within the first hour of hatching.
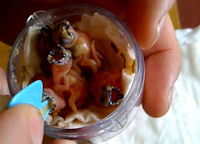
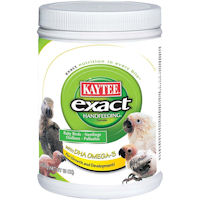
On the second day, chicks can be fed using a hand-rearing formula (I use Kaytee Exact, Figure 8, which works reliably). The mixture should be watery to allow easy swallowing and digestion, as the chicks have never eaten before. Use a thermometer to ensure the mixture is at the same temperature as the chicks.
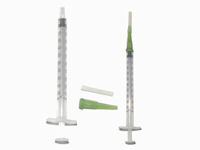
Never overfeed, force-feed, or offer too much food at once, as this can cause choking. Small beaks require precise feeding tools; you can use a matchstick or an old ring applicator (Figure 15). Feed from 6 a.m. to 9 p.m., every 30 minutes. Place chicks on tissue paper and change it after each feed. Wash your hands thoroughly before feeding to minimize bacterial risk.
If a chick does not open its beak, gently tap the side of the beak with your feeding tool; the chick should respond. Place the food at the back of the throat behind the tongue. I personally mix approximately 2/3 water to 1/3 formula using hot water, preparing only enough for each feeding and allowing it to cool to the correct temperature. Mix fresh batches every 30 minutes.
Day three follows the same feeding schedule and procedures as day two. Ensure chicks remain warm and the humidity stays high to prevent dehydration. Common problems include dehydration, overheating, improperly mixed food, incorrect amounts, and irregular feeding times.
Observe the crop: when full, stop feeding. For weaker chicks, ensure there is always some food in the crop, even if only a quarter full. At this stage, you can slightly lower the incubator or brooder temperature to around 85 °F.
Repeat the process from day three. The main difference will be a slight increase in the chicks’ size.
Continue as on day three, but thicken the food slightly. Chicks should have nearly doubled in size compared to day one. Droppings will be larger, more defined, and less watery.
If all is well, all chicks should be alive and healthy. They will beg loudly when disturbed. Begin introducing hulled whole seeds (shells removed) into their diet. You can remove seeds manually from spray millet, roll them in a bowl to remove shells, and blow away chaff.
Add these seeds and possibly cucumber centers to the hand-rearing mix, along with a small amount of mashed hard-boiled egg for extra nutrition. Feather tips should just start emerging from the skin. Eyes will usually remain closed until around day nine, when gradual opening begins, marking the start of imprinting.
At this stage, observe increased food consumption, larger droppings, louder begging, and growth in physical size. Feeding can often be reduced to once per hour with larger portions. The food mixture should be approximately 50/50 water to formula, or 60% formula and 40% water if feeding cucumber for hydration.
From this point, feeding remains largely the same until fledging, though you can begin adding more solid foods, such as seeds and egg food. Move chicks from the incubator or brooder to a makeshift nest similar to a finch nest. They should now be able to regulate their body temperature, provided ambient conditions are not too cold. Chicks raised in cold conditions may develop lifelong shivering and require constant heat for survival.
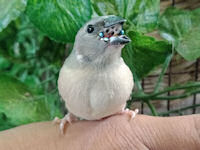
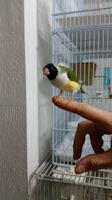
Around day 21, chicks would normally naturally fledge the nest. It is good practice to place them into a cage so that they never feel confined. Fledgling chicks will become familiar with the cage as their home, but you can allow them out to fly at your discretion. Introducing a finch to a cage it has never fledged in can be tricky, as they are likely to want to escape and may be fearful. The fledgling stage is a milestone, much like the day they hatched, and it will be exciting for both you and the birds as they explore their surroundings.
You are responsible for showing them safe places to perch, where to find food, water, and baths. You can use your finger to splash around in the bath to demonstrate that it is a place to bathe. Finches learn quickly, and with proper interaction, they will become accustomed to you. How much time you spend with your finches and how you treat them will influence their friendliness toward you.
Even after fledging, feeding will still be required regularly, as chicks often come to you begging for food. This can last several weeks, during which feeding should gradually decrease (the weaning process). Some finches may begin eating independently as early as day 1 after leaving the nest, but they will still need your help until they are fully self-sufficient.
Once weaned, continue spending time with them. They are still young until they go through their first annual moult, which marks the final developmental milestone. At this point, they are considered true adults. When your finches have fully coloured feathers, you can start taking keepsake photos or share them with others, as many of our members do. The dedication and love invested in raising finches often result in stunning, healthy birds.